
Firmware Installation Guide XYAUTO YT9250 – YT9270 with DSP Equalizer Based Processor AC8227L
Also check:
8227L-based Headunits of XYAUTOS are very famous in aftermarket industry, its introduced especially for those users who want to upgrade their car infotainment system. These head units typically run on a custom version of the Android operating system and offer a range of features including multimedia playback, navigation and connectivity options Here is a detailed overview
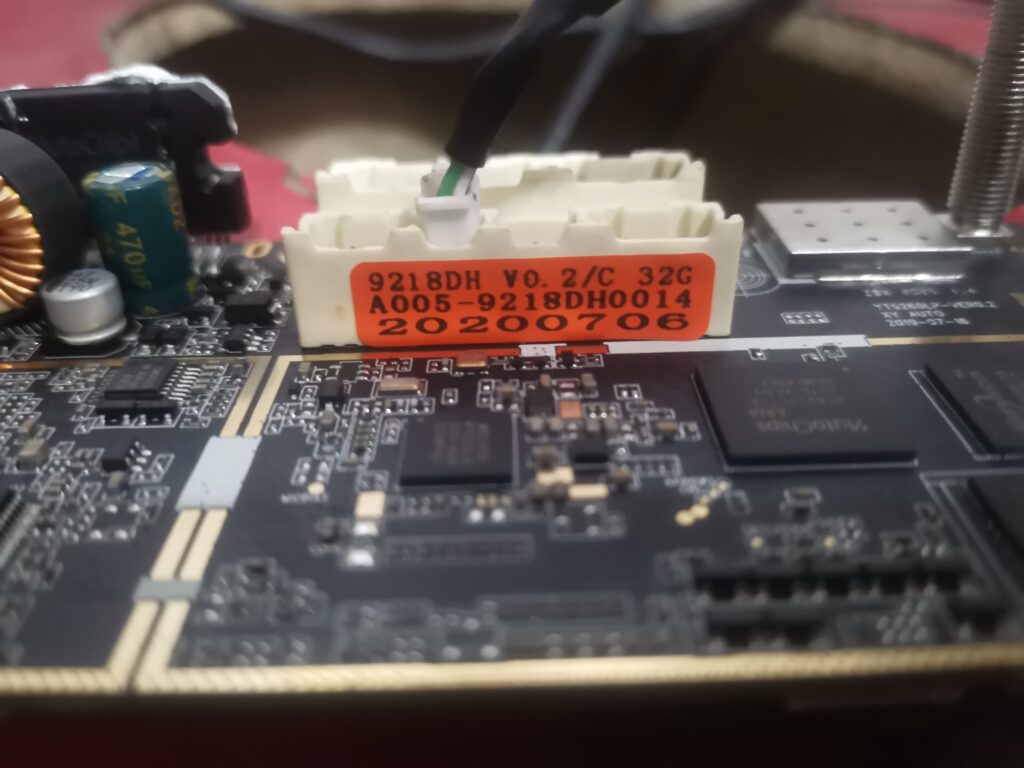
Hardware Specifications
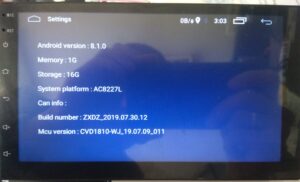
- Operating system: Android 6.0 API version 23 or Android 8.1 API version 27
- Processor: AC8227L 4 cores 1.2 GHz
- RAM: 1/2 GB
- Built-in memory: 16/32 GB
- Display size: 9″
- Display resolution: 1024 * 600
- Touchscreen: capacitive
- Location: horizontal
- Amplifier (ULF): TDA7388 / AC7315
- Output power: 4 * 50 W
- Radio chip NXP6851 / NXP6856
- DSP chip: ADAU1701
- Wi-Fi: YES
- BT: YES (works as a headset; connection of OBD scanner)
- USB 2.0: 2 pcs
- GPS: YES
- AV-Out: Yes, output to the headrest monitor.
- Video input: YES
About Hardware:
- Processor:The 8227L chipset is commonly used in these head units. It is a quad-core processor, which provides a balance between performance and energy efficiency.
- RAM and Storage: The 8227L chipset is normally used in car infotainment systems. It has quad-core processor, which affords a balance among overall performance and power efficiency.These head units normally came with 1GB to 4GB of RAM and 16GB to 64GB of internal storage, depending on the model and price range. Some units also support external storage via USB or microSD cards.
- Display: Capacitive touchscreens that vary in resolution from 7 inches to 10.1 inches will be featured.
Software and Features
Operating System:
These head units run on Android OS, usually versions 9.0 to 10.0, providing a familiar interface and access to the Google Play Store for app downloads.
User Interface:
The UI is typically customized for car infotainment systems, it has large icons and easy to navigate menus and designed for use while driving.
DSP Equalizer:
- One of the outstanding features in the headunit is built-in DSP (Digital Signal Processor) equalizer. It allow us to fine-tune their audio experience with advanced settings such as:
- Fine control over different frequency ranges. Adjust the timing of the digital audio signals to ensure they reach the listener at the same time, also enhancing the sound quality.
- It controls the frequency range sent to different speakers (e.g., subwoofers, tweeters).
- Pre-configured EQ settings for different music and listening preferences.
- Save custom audio profiles for different users or driving conditions.
Integration with Vehicle Systems:
Compatibility with steering wheel controls, reverse camera input, and in some cases, integration with CAN bus systems to display vehicle information.
Additional Features:
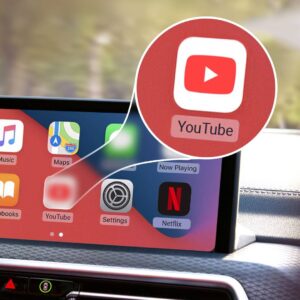
- Support for Android Auto and Apple CarPlay in some models.
- FM/AM radio with RDS.
- USB and AUX inputs for external devices.
- Support for DVR (Dash Cam) input and recording.
- Installation and Compatibility
Installation:
Installation can vary depending on the car model and the head unit’s design. Some units are designed for universal fit, while others are made for specific car models with custom mounting kits.Professional installation is recommended to ensure compatibility with the car’s wiring and systems.
Compatibility:
Before buying, it is important to check whether the special vehicle matches the make and model of the vehicle. Some models are designed specifically for certain types of vehicles and come with necessary cables and adapters.
Download Firmware for XYAUTO Headunits with HiFi Version:
Download Firmware XYAUTO Headunits with DSP Equalizer
Firmware Installation Guide with USB
To install XYAUTO firmware on your 8227L head unit using a USB drive, follow these steps:
- Download the Firmware
- Obtain the correct firmware for your specific head unit model. Make sure it matches the Android version and hardware configuration (e.g., touch screen, volume knobs).
- Firmware files also upload in this post you can download from the given link.
- Use a USB drive with at least 4GB capacity.
- Format the USB drive to FAT32.
- Extract the downloaded firmware zip file
- After extract you get the folder XYAUTOUPG in the root of the USB drive.
- If the folder contains preloaded file delete it
- By using 4 Pin USB drive flash drive in and press reset button for full factory firmware installation.
- Make sure that the archive contains the file “XYAUTOUPG”
- Wait for the installation Process
- Do not turn off the power or remove the USB drive during the update process.
- The head unit will reboot several times during the installation.
- After the update is complete, the head unit will perform a final reboot.
- Remove the USB drive only after the head unit has fully restarted and is operational.
Post-Installation:
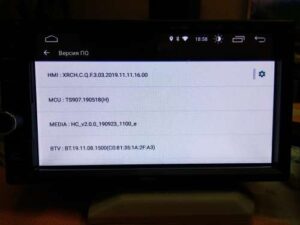
- Verify the Update:
- Check the firmware version in the head unit’s settings to ensure the update was successful.
- Test various functions to make sure everything is working properly.
- Restore Settings:
- If necessary, restore your personal settings and preferences that may have been reset during the update.
Firmware Installation Process with SPFLASH Tool:
To install XYAUTO firmware on your 8227L head unit using the SP Flash Tool, follow these steps:
Requirements:
- Firmware File: Download the correct firmware for your headunit model
- SP Flash Tool: Download and install SPflash tool into your computer
- VCOM Drivers: Install the VCOM USB drivers
- USB Cable: Use male to male USB cable to connect your head unit to the computer in 4 pin USB connector.
Firmware Preparation:
- Download and Extract Firmware: Make sure you download firmware after extracted into know computer location where you can find easily.
- Install VCOM Drivers: Download the VCOM USB drivers and install them. These drivers are necessary for the SP Flash Tool to recognize your device.
- Download SP Flash Tool: Download the SP Flash Tool from a reliable source and extract it to a known location on your computer.
Installation Process:
- Launch SP Flash Tool:
- Open the SP Flash Tool folder and run
flash_tool.exeas an administrator.
- Open the SP Flash Tool folder and run
- Load Scatter File:
- Click on the “Choose” button in the SP Flash Tool next to the “Scatter-loading File” field.
- Navigate to the extracted firmware folder and select the
MTXXXX_Android_scatter.txtfile (whereMTXXXXis the specific MediaTek chipset number, such as MT8227, etc.).
- Prepare for Flashing:
- Ensure all the required files are loaded and selected in the SP Flash Tool.
- Make sure the “Download Only” option is selected in the drop-down menu (you can also select “Firmware Upgrade” if you are upgrading the firmware).
- Connect the Head Unit:
- Turnoff your headunit also disconnect from other power source.
Connect headunit with the usb cable by using 4 pin connector.
- Turnoff your headunit also disconnect from other power source.
- Begin Flashing:
- Click the “Download” button in the SP Flash Tool.
- The SP Flash Tool will begin looking for your device. Once connected, the flashing process will start automatically.
- Wait for Completion:
- Do not disconnect the device or interrupt the process until the flashing is complete. A green checkmark will appear indicating the process is successful.
- Reboot the Head Unit:
- Disconnect the USB and then power on your headunit.
- Initially headunit take time then usual.
Post-Installation:
- Verify Firmware Update:
- Check the firmware version in the head unit’s settings to ensure the update was successful.
- Test various functions to make sure everything is working properly.
- Restore Settings:
- Restore your personal settings and preferences if they were reset during the update.
Troubleshooting:
- Connection Issues: Ensure VCOM drivers are correctly installed and the USB cable is functioning.
- Firmware Mismatch: Make sure you have the correct firmware for your specific head unit model.
- Error Messages: Refer to SP Flash Tool documentation or forums for specific error code troubleshooting.
Also check:
Thank you for reading! If you found this blog helpful please give suggestion in comment box. Be sure to explore more on our blogs where we regularly update with the latest insights and reviews on tech gadgets and firmware updates. Don’t forget to check out our Firmware for the best selections of Android Auto car stereos and more.
If you have any questions or need further assistance, feel free to contact us. We’re here to help you get the most out of your tech experiences.