XYAUTO YT9212-YT9218 AC8227L Headunits (Non-DSP) AC8227L based Processor Firmware Installation Guide
Also check:
XYAUTOS offers a premium range of headunit products designed to enhance your driving experience. Chinese XYAUTOS headunit motherboard series YT9211, YT9212, YT9213, YT9216, YT9217, YT9218 and in DSP Sound 9250 and 9270 available in the market (will not discuss in this post). HiFi and Non-HiFi versions are also being introduced by XYAUTO manufacturers.
Specification
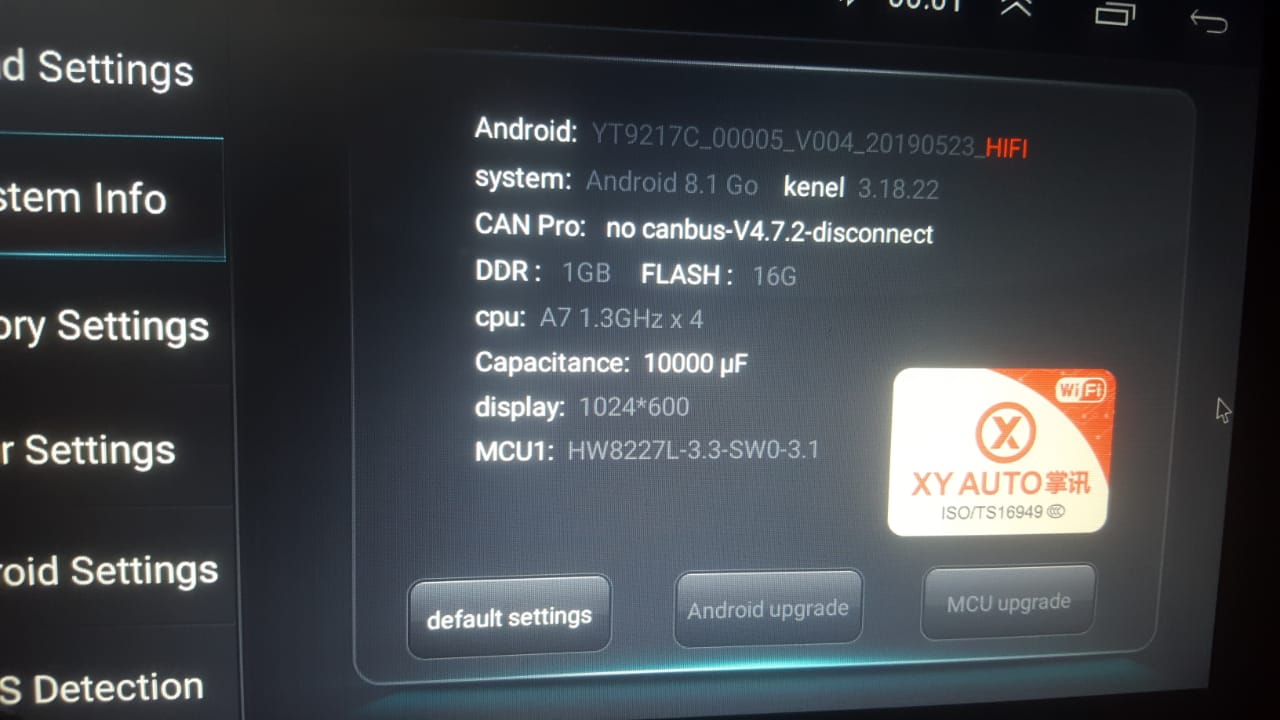
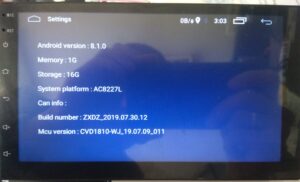
- Chipset: AC8227L
- Architecture: Quad-core ARM Cortex-A7
- Clock Speed: Up to 1.3 GHz
- RAM: Typically 1GB or 2GB
- Storage: Common configurations are 16GB or 32GB eMMC flash storage
Operating System
- OS: Android 6.0 to 8.1 (often labeled incorrectly as newer versions like Android 9 or 10)
Features
- Multimedia: Supports various audio and video formats
- Navigation: GPS with offline and online maps
- Connectivity: Bluetooth for hands-free calling and audio streaming, Wi-Fi for internet access
- Display: Typically supports resolutions of 1024×600
- USB Ports: Multiple USB ports for external storage and peripherals
- CANBUS: Compatibility with vehicle CANBUS systems for integrated controls
Customization
- Firmware Updates: Available through official and community sources, with many users opting for custom ROMs to enhance performance and features
- Root Access: Can be obtained, allowing for deeper customization and use of advanced apps like Viper4Android for enhanced audio control
- Bootloader Unlocking: Possible, but may require technical knowledge and tools such as ADB and Fastboot for command-line operations
There are many different variants or models introduced by XYAUTOS in the market that come with different UI in the shape of 9”, 10”.1 and Tesla Style nowadays.
Common Problems and Solutions for XYAUTOS Car Headunits
XYAUTOS Headunits produce high quality and advanced features then other, wide range of Car Headunits introduced in market with cheap Price. In this blog, we’ll explore and discuss some common problems and also there solution to ensure your device continues to function smoothly.
1. Touchscreen Unresponsiveness
Problem: One of the most common issues is an touchscreen not responsive or out of order, which can result from software glitches or hardware faults.
Solution:
- Restart the Headunit: Sometimes a simple restart can resolve the issue. By using paper clip press reset button and restart headunit if your headunit hang due to background process not responding this trick will solve your touch problem with software glitches.
- Factory Reset: If the problem remain same, try to perform a factory reset. After factory data reset your setting and data also be remove so make sure to back up your important information in any external drive.
- Professional Assistance: If the screen remains unresponsive, it may be a hardware issue that requires professional technician.
2. Connectivity Issues
Problem: Users often face difficulties connecting their smartphones via Bluetooth or USB.
Solution:
- Reset Bluetooth Settings: Turn off Bluetooth on both your phone and the headunit, then turn them back on and attempt to reconnect.
- Clear Paired Devices: If your device is not pairing, clear all previously paired devices from the headunit’s memory and try pairing again.
- Check Cables and Ports: For USB connections, ensure the cable and ports are functioning correctly. Try using a different cable or port.
- Software Updates: Keeping your headunit’s software up-to-date can often resolve connectivity issues.
3. Navigation System Errors
Problem: The navigation system may occasionally provide incorrect directions or fail to load maps.
Solution:
- Update Maps: Regularly update your maps to ensure you have the latest data. This can usually be done via the headunit’s settings or through the manufacturer’s website.
- GPS Signal Check: Ensure your GPS antenna is properly connected and not obstructed. Sometimes, placing the antenna in a different location can improve signal reception.
- Reset Navigation Settings: Resetting the navigation settings to default can often resolve errors.
4. Audio Quality Issues
Problem: Poor audio quality, including static or no sound, can detract from the overall experience.
Solution:
- Check Connections: Ensure all audio cables and connections are secure and not damaged.
- Adjust Settings: Go through the audio settings on your headunit to ensure they are correctly configured for your vehicle’s speaker system.
- Speaker Check: Test your car’s speakers with another audio source to determine if the issue is with the headunit or the speakers themselves.
- Firmware Updates: Occasionally, audio issues can be resolved with a firmware update from the manufacturer.
5. System Lag or Freezing
Problem: Your headunit may occasionally lag or freeze, affecting its overall performance.
Solution:
- Close Unnecessary Applications: Running multiple applications simultaneously can slow down the system. Close any apps you’re not using.
- Restart the Headunit: A simple restart can often resolve performance issues.
- Free Up Memory: Clear out unnecessary files or apps to free up memory.
- Factory Reset: As a last resort, perform a factory reset to restore the system to its original state.
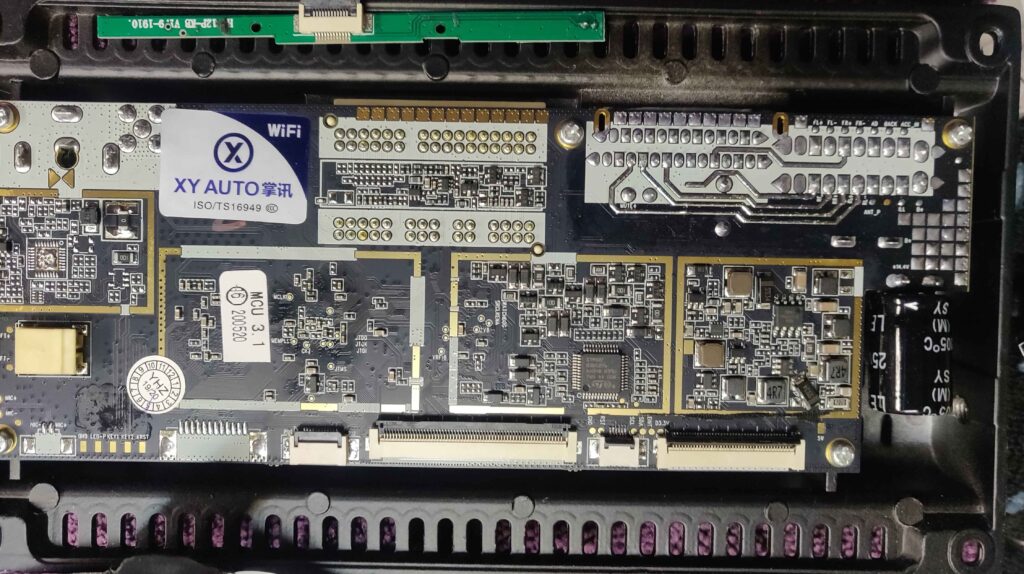
Variants of 92xx Series Headunit Motherboards AC8227l Based Processor
Firmware Installation Guide with USB
Obtain the correct firmware for your specific head unit model. Make sure it matches the Android version and hardware configuration (e.g., touch screen, volume knobs).
Firmware files also upload in this post you can download from the given link.
- Use a USB drive with at least 4GB capacity.
- Format the USB drive to FAT32.
- Extract the downloaded firmware zip file
- After extract you get the folder XYAUTOUPG in the root of the USB drive.
- If the folder contains preloader file delete it
- By usnig 4 Pin USB drive flash drive in and press reset button for full factory firmware installation.
- Make sure that the archive contains the file “XYAUTO UPDATE.bin
- Wait for the installation Process
- Do not turn off the power or remove the USB drive during the update process.
- The head unit will reboot several times during the installation.
- After the update is complete, the head unit will perform a final reboot.
- Remove the USB drive only after the head unit has fully restarted and is operational.
Post-Installation:
- Verify the Update:
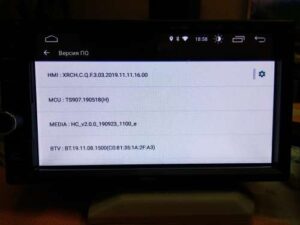
- Check the firmware version in the head unit’s settings to ensure the update was successful.
- Test various functions to make sure everything is working properly.
- Restore Settings:
- If necessary, restore your personal settings and preferences that may have been reset during the update.
Firmware Installation Process with SPFLASH Tool:
To install XYAuto firmware on your 8227L head unit using the SP Flash Tool, follow these steps:
Requirements:
- Firmware File: Download the correct firmware for your headunit model
- SP Flash Tool: Download and install SPflash tool into your computer
- VCOM Drivers: Install the VCOM USB drivers
- USB Cable: Use male to male USB cable to connect your head unit to the computer in 4 pin USB connector.
Preparation:
- Download and Extract Firmware:
- Make sure you download firmware after extracted into know computer location where you can find easily.
- Install VCOM Drivers:
- Download the VCOM USB drivers and install them. These drivers are necessary for the SP Flash Tool to recognize your device.
- Download SP Flash Tool:
- Download the SP Flash Tool from a reliable source and extract it to a known location on your computer.
Installation Process:
- Launch SP Flash Tool:
- Open the SP Flash Tool folder and run
flash_tool.exeas an administrator.
- Open the SP Flash Tool folder and run
- Load Scatter File:
- Click on the “Choose” button in the SP Flash Tool next to the “Scatter-loading File” field.
- Navigate to the extracted firmware folder and select the
MTXXXX_Android_scatter.txtfile (whereMTXXXXis the specific MediaTek chipset number, such as MT8227, etc.).
- Prepare for Flashing:
- Ensure all the required files are loaded and selected in the SP Flash Tool.
- Make sure the “Download Only” option is selected in the drop-down menu (you can also select “Firmware Upgrade” if you are upgrading the firmware).
- Connect the Head Unit:
- Turnoff your headunit also disconnect from other power source.
Connect headunit with the usb cable by using 4 pin connector.
- Turnoff your headunit also disconnect from other power source.
- Begin Flashing:
- Click the “Download” button in the SP Flash Tool.
- The SP Flash Tool will begin looking for your device. Once connected, the flashing process will start automatically.
- Wait for Completion:
- Do not disconnect the device or interrupt the process until the flashing is complete. A green checkmark will appear indicating the process is successful.
- Reboot the Head Unit:
- Disconnect the USB and then power on your headunit.
- Initially headunit take time then usual.
Post-Installation:
- Verify Firmware Update:
- Check the firmware version in the head unit’s settings to ensure the update was successful.
- Test various functions to make sure everything is working properly.
- Restore Settings:
- Restore your personal settings and preferences if they were reset during the update.
Troubleshooting:
- Connection Issues: Ensure VCOM drivers are correctly installed and the USB cable is functioning.
- Firmware Mismatch: Make sure you have the correct firmware for your specific head unit model.
- Error Messages: Refer to SP Flash Tool documentation or forums for specific error code troubleshooting.
Also check:
Thank you for reading! If you found this blog helpful, be sure to explore more on our blogs where we regularly update with the latest insights and reviews on tech gadgets and firmware updates. Don’t forget to check out our Firmwares for the best selections of Android Auto car stereos and more.
If you have any questions or need further assistance, feel free to contact us. We’re here to help you get the most out of your tech experiences.


Hi I recently purchased a firmware update for an F9212b_00020_v001 head unit and when I try to download it says I don’t have permission to view that page??? Any help would be greatly appreciated.
Hi, Rezhill Plz recheck the Link again, hopefully its working now..
Sir my android not working you tube please guide me
Kindly contact for all the questions and queries to our expert https://wa.me/message/6TYA5SVRZ2FWM1